

If you want a reliable way to store homemade broth safely for months, learning how to pressure can chicken stock is one of the most valuable kitchen skills you can master. This method allows you to turn fresh, nutrient-rich stock into shelf-stable pantry jars—no freezer space required.
Unlike water bath canning, pressure canning is the only safe method for preserving low-acid foods like chicken stock, ensuring long-term storage without spoilage risks. By following the correct pressure levels, processing times, and safety guidelines, you can confidently preserve broth that stays flavorful, nutritious, and ready to use anytime.
Whether you’re building a stocked pantry, saving money, or simplifying meal prep, this step-by-step guide will show you how to pressure can chicken stock safely, efficiently, and with consistent results every time.
Quick Answer: How Do You Pressure Can Chicken Stock Safely?
To pressure can chicken stock, strain the broth, heat it to boiling, and fill sterilized jars leaving 1-inch headspace. Process pint jars for 20 minutes and quart jars for 25 minutes at 10 PSI (or adjusted for altitude). Always use a pressure canner—not a pressure cooker—for safe, shelf-stable storage.
Why Pressure Canning Is Required for Chicken Stock
Pressure canning is the only safe method for preserving low-acid foods like chicken stock. Unlike high-acid foods that can be processed in a water bath, chicken broth requires high temperatures to destroy harmful bacteria such as botulism.
A pressure canner reaches temperatures above boiling water, which ensures that your stock becomes completely safe and shelf-stable for long-term storage. This is why organizations like the USDA strongly recommend pressure canning for all meat-based broths.
Using any other method, such as water bath canning, may result in unsafe storage and spoilage. By following proper pressure canning guidelines, you ensure your homemade chicken stock remains safe, nutritious, and ready to use anytime.
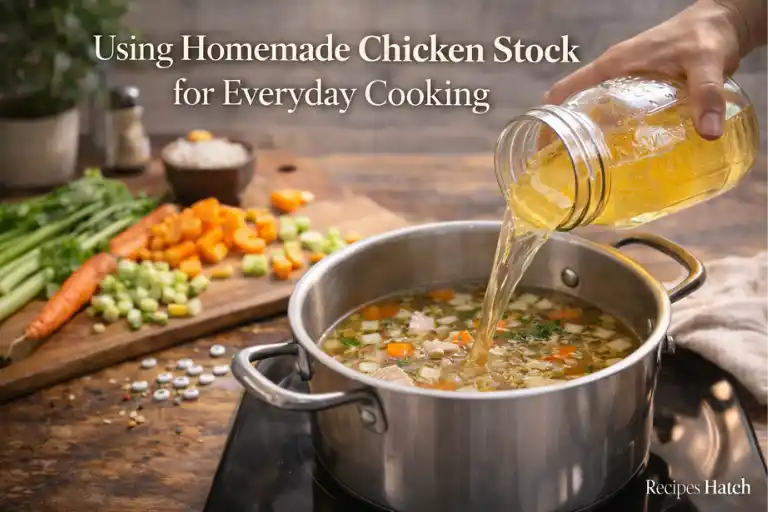
Using Homemade Chicken Stock for Everyday Cooking
- Chicken stock adds depth of flavor to favorite recipes like soups, stews, and rice
- Handy jars of broth keep meal prep ready-to-go and reduce reliance on store-bought options
- Homemade and home-cooked stock made from chicken carcasses or beef bones helps stretch the grocery budget
- Using stovetop or Instant Pot methods allows you to utilize all parts with no waste
- Canning broth saves freezer space and makes pantry shelf storage possible
- Having prepared broth on hand saves time, prevents stress, and simplifies menu planning
- Nutrient-rich chicken bone broth provides vitamins, minerals, aromas, and rich flavor profiles
- This approach supports calm, affordable cooking even with busy family life, frozen ingredients, and last-minute supper ideas
Benefits of Preserving Chicken Stock at Home
Pressure canning bone broth at home is a quick, easy, and inexpensive way to make ingredients ready for family meals. Having canned meals or freeze-dried meals on the shelf can save dinnertime stress while ensuring healthy, homemade chicken broth is always available. I typically make a minimum of two gallons at a time so we can use up the broth before it goes bad, and the process is surprisingly handy and cost-effective, costing only pennies instead of paying $8 for brands of organic, free-range chicken broth.
Using the broth for homemade recipes or making chicken bouillon from leftover chicken carcasses lets you make full use of your ingredients with no waste. Whether cooked on the stovetop or Instant Pot, the bone broth enriches soups, stews, rice, and other staples, providing nutrient-rich flavor while simplifying menu planning, grocery shopping, and meal prep. This method stretches the grocery budget, helps manage frozen ingredients, and keeps the pantry shelf stocked, so you can get to work on meals quickly without stress.
Essential Supplies for Pressure Canning
- Need canning jars in appropriate jar size for household use
- Quart-size jars for large family, pint-size jars for smaller portions
- Use two-part sealing lids, new lids for a proper seal, avoid used lids
- Funnel, preferably stainless steel funnel, helps fill jars neatly
- Vinegar is used to clean the jar rim before placing canning lids
- Use a clean towel or lint-free towel, paper towel works if needed for sanitation
- Pressure canner (e.g., All-American Canner) is essential
- Jar lifter or favorite jar lifter for safe handling of hot jars
- Prevent burn hands and ensure hand safety
- Follow instructions carefully while pressure canning
- Makes the process smooth, stress-free, and safe for home canning
Ingredients for Homemade Chicken Stock
For a small batch of chicken broth, start with one chicken carcass or picked bones from 1 roast chicken weighing 4-5 lbs (2-2.25 kg) before cleaning. You’ll also need 2 large carrots, 1 large onion, 2 bay leaves, 1 Tbsp (15 ml) salt, and 1 Tbsp (15 ml) apple cider vinegar to enhance the flavor. Add 2 quarts (2 L) water and any herbs you like. This is just a guideline, so feel free to substitute with a turkey carcass or adjust quantities for a full canner batch, making four pints or two-quart jars.
On our homestead, we often make big batches using chicken backs, necks, and feet in a big stock pot, sometimes reaching a 14-quart batch. When pressure canning, the process is always the same, whether using your favorite recipe or a detailed recipe for turkey broth. Make sure to strain the liquid well; only liquid should go into the canner since no solids are safe for canning time. Whether you follow the Homemade Chicken Bone Broth method or try the Instant Pot Chicken Bone Broth (+Super Immune-Boosting Ingredient), these ingredients ensure a nutrient-rich, flavorful stock that suits any average family or leftover roast chicken dinner.
- One chicken carcass or picked bones from 1 roast chicken (4-5 lbs / 2-2.25 kg)
- 2 large carrots, 1 large onion, 2 bay leaves
- 1 Tbsp (15 ml) salt, 1 Tbsp (15 ml) apple cider vinegar
- 2 quarts (2 L) water, optional herbs
- Optional substitutions: turkey carcass, chicken backs, necks, feet
Preparing Homemade Chicken Broth
To start preparing homemade chicken broth, roast your bones first. This adds depth of flavor to the finished broth, giving a better flavored broth and a rich golden color. Roasting also keeps the broth clear by setting proteins in the meat and preventing raw leftover juices or blood from clouding the liquid. Place the attached bones in a large stainless steel crock or enameled Dutch oven with your ingredients, then add water to cover. You can simmer on the stovetop or use a slow cooker, but avoid a hard boil to maintain a high-quality stock.
Following the Ball Blue Book of Canning, preheat your oven to 225 degrees Fahrenheit (107 Celsius) and bake, covered, for seven hours, then reduce the oven temperature to 180 degrees Fahrenheit (90 Celsius) for another seven hours, adding water as needed to ensure bones covered. After cooking many hours, remove bones, pour the liquid through a fine wire mesh strainer into a glass measuring cup or large bowl, get rid solids, skim fat, and your beautifully clear chicken bone broth with light golden amber color is ready for canning. Whether cooking a single chicken carcass or following pressure canning recipes for larger batches, using this method extracts connective tissues and nutrients while keeping your chicken broth flavorful.
Pressure Canning Cooked Chicken Stock
When you’re ready to pressure can chicken stock, gather your pressure canner—I use my All-American Canner—along with pint sized canning jars or quart sized canning jars. Make sure your canning jars have matching lids and rings, such as the FOR JARS lids (use code PURPOSE10 if ordering). You’ll need your beef bones or poultry bones, veggies like onions, carrots, celery, garlic, and seasonings such as black pepper, fresh thyme, dried thyme, rosemary, sage, plus a splash of apple cider vinegar to help preserve flavors. A large stock pot or crockpot works for cooking, and you can also reference a slow cooker, Heritage Cooking Crash Course, or video tutorial for tips.
Once your homemade stock is ready, which is more frugal, healthy, and full of nutrients than store-bought or pseudo-stuff, carefully fill the canning jars. Use the pressure canner according to instructions, ensuring jars are sealed properly with rings and matching lids. This process keeps your stock safe and shelf-stable while preserving all the natural flavors and nutrition. Following these steps and tips will make your pressure-canned chicken stock a convenient, nutrient-rich staple for any meal.
Pressure Canning Cooked Chicken Stock
Start by pouring your cooled stock and skimmed stock back into a large stockpot and bring it to a boil while getting your pressure canner heating. Prepare your jars and equipment, and follow a full tutorial on pressure canning if needed. Once the hot jars are ready, ladle the stock into quarts or pints—I prefer pint-sized for most of my recipes and smaller quantities. Leave 1 inch headspace, affix the lids, and place them carefully in the pressure canner.
Process the pints for 20 minutes at 10 pounds pressure or quarts for 25 minutes at the same pressure. After processing, remove jars and allow them to cool completely. This method ensures a frugal, nutritious, ready-to-go broth that is safe for storage and perfect for all your favorite recipes.
Safe Chicken Broth Canning Process
Regardless of the method you used to make chicken bone broth, the canning instructions are always the same. First, prepare your pressure canner for hot pack, following the manufacturer’s instructions for your brand. Add the bottom trivet and fill with 2-3 inches of water, then bring it to a gentle simmer at 180 degrees F. While the canner heats, prepare your jars with rings, whether pints or quarts, ladle the hot broth into prepared and sanitized jars, leaving 1 inch (2.5 cm) of headspace. Remove air bubbles using a bubble remover tool and check headspace. Wipe the jar rim to remove food residue, then secure with the lid and band, adjusting to fingertip tight. Load the jars, put lid on the locked position, and adjust heat to medium-high, then vent steam for 10 minutes before adding the weighted gauge or counterweight.
Bring pressure to 10 lbs (weighted-gauge) or 11 lbs (dial-gauge) and process pints for 20 minutes or process quarts for 25 minutes. After the turn off heat, let the canner depressurize for 5 minutes, then remove lid. Carefully cool jars, remove from canner, and continue cooling on the counter. After 12 hours, store jars, check seals, and label each one with the date. This safe process ensures your homemade chicken stock is frugal, nutritious, and ready-to-go for all your favorite recipes.
Pressure Canning Chart for Chicken Stock
| Jar Size | Pressure (Weighted) | Pressure (Dial) | Processing Time |
|---|---|---|---|
| Pints | 10 PSI | 11 PSI | 20 minutes |
| Quarts | 10 PSI | 11 PSI | 25 minutes |
At higher altitudes, pressure must be increased to maintain safety.
Altitude Adjustments for Pressure Canning
Altitude plays a critical role in pressure canning because water boils at lower temperatures at higher elevations. This means you must increase pressure to ensure food is processed safely.
For elevations above 1,000 feet, increase pressure according to your canner type. Weighted gauge canners typically require 15 PSI at higher altitudes, while dial gauge canners require gradual adjustments. Ignoring altitude adjustments can result in under-processed food, which is unsafe for storage.
Serving Ideas for Chicken Bone Stock
There’s nothing like the comforting flavor of a nourishing bowl of chicken bone broth. When it comes to serving, the possibilities are endless. Enjoy a light meal by heating and sipping your broth on its own, or prepare a heartier dinner by adding noodles, vegetables, or cooked grains like quinoa or rice for a filling meal. Don’t forget to add a topping of fresh herbs to elevate your dish.

Whether you enjoy alone or spice up your broth with other ingredients, it’s sure to satisfy the dinner table. Use it as a base for meals, side dishes, or risotto, and even for steamed vegetables. Be creative—or get creative—with your delectable treat, making the most of this virtually limitless ingredient.
Shelf Life and Storage Tips for Canned Chicken Stock
Proper storage ensures your pressure-canned chicken stock stays fresh and safe.
Store sealed jars in a cool, dark place such as a pantry. Properly canned stock can last up to 12 months while maintaining quality.
Always label jars with the date and check seals before use. If a jar loses seal or shows signs of spoilage, discard it immediately.
Common Pressure Canning Mistakes to Avoid
Even experienced home canners can make mistakes that affect safety and quality.
One of the biggest mistakes is not removing fat from broth, which can interfere with proper sealing. Another common issue is incorrect headspace—too much or too little can prevent jars from sealing.
Failing to vent steam for 10 minutes before pressurizing can trap air inside the canner, leading to improper processing. Rapid pressure changes can also cause liquid loss (siphoning).
Pressure Canning Checklist (Quick Reference)
- Use only a pressure canner
- Strain broth (no solids)
- Maintain 1 inch headspace
- Vent steam for 10 minutes
- Follow correct PSI and time
- Adjust for altitude
- Cool jars completely before storage
FAQs About How to Pressure Can Chicken Stock
Q1: What is the correct pressure and time for canning chicken stock?
To pressure can chicken stock, use 10 PSI for pints and 25 minutes quarts at 11 PSI, adjust for altitude as needed. Refer to your manual to determine exact increase PSI if at altitude > 1,000 ft, while altitude 0-1,000 ft uses standard weighted gauge or dial gauge. Proper processing ensures a shelf-stable, 1 year, cool dark place stock.
Q2: Do I need to remove fat before canning?
Yes, removing fat is essential. Chill stock overnight and skim solidified fat to prevent excess fat from interfering with seal or causing it to turn rancid in long-term storage. Always wipe rims with vinegar before sealing hot jars in a pressured canner.
Q3: Why did my jars not seal?
Common issues include fat residue, rims not wiped clean, headspace too little or headspace too much, and pressure fluctuations. Pressure dropped or pressure varied too quickly during processing. Ensure correct 1-inch headspace, lid sealed, and follow pressure canning process instructions to avoid breakage.
Q4: Can I use a pressure cooker instead of a canner?
Only use a dedicated pressure canner for maintaining required PSI for the full duration. Smaller electric pressure cookers are not recommended for canning. Straining cooked broth, filling hot jars, and adding hot stock are still required steps in both cases.
Q5: What if liquid level dropped or jars lose seal?
A slight drop in liquid level is normal (siphoning). As long as lid sealed, it is safe to eat. Always sterilize jars by keeping them hot, and check jars not seal before storage. Following how long to pressure can chicken stock and how long chicken stock take in a pressure cooker ensures safe ready-to-go broth for favorite recipes.
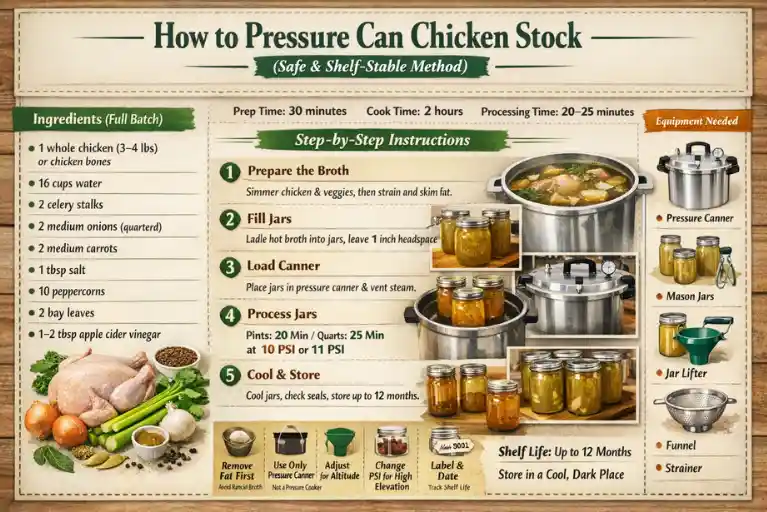
Recipe Card – How to Pressure Can Chicken Stock Recipe
Course: Chicken RecipesCuisine: Homestead, TraditionalDifficulty: Easy4
servings30
minutes2
hours50
kcalLearn how to pressure can chicken stock safely using USDA-approved methods. This step-by-step guide helps you preserve homemade broth for long-term, shelf-stable storage with perfect results every time.
Ingredients
1 whole chicken (3–4 lbs) or chicken bones
16 cups of water
2 celery stalks
2 medium onions (quartered)
2 medium carrots
1 tbsp salt
10 peppercorns
2 bay leaves
1–2 tbsp apple cider vinegar
Instructions
- Prepare the Broth
Place chicken, vegetables, and seasonings in a large stockpot. Add water and bring to a boil. Reduce heat and simmer for 2–4 hours (or longer for richer broth). - Strain the Stock
Remove chicken and strain liquid through a fine mesh sieve or cheesecloth. Discard solids. Let the broth cool and skim off the fat. - Prepare Jars
Wash jars, lids, and bands. Keep jars hot in simmering water. Do not boil lids. - Fill Jars
Reheat broth to boiling. Ladle hot broth into jars, leaving 1 inch headspace. Remove air bubbles and wipe rims clean with vinegar. - Load Pressure Canner
Place jars in the pressure canner with 2–3 inches of water. Lock lid and heat. - Vent Steam
Allow steam to vent for 10 minutes before adding weight. - Process Jars
Pints → 20 minutes
Quarts → 25 minutes
At 10 PSI (weighted) or 11 PSI (dial gauge)
Adjust pressure for altitude if needed. - Cool and Store
Turn off the heat, allow the canner to depressurize, and remove jars. Cool for 12 hours. Check seals, label, and store in the pantry.
Recipe Video
Notes
- Always remove fat before canning
- Never can broth with solids inside
- Use only a pressure canner (not a pressure cooker)
- Maintain consistent pressure during processing
- Label jars with a date for storage tracking
Conclusion
Pressure canning your chicken stock is a reliable way to enjoy nutritious, homemade broth year-round. By following proper pressure canning steps, including removing fat, monitoring headspace, and adjusting for altitude, you ensure clear, flavorful, shelf-stable stock. This method preserves nutrients, saves time, and provides a versatile base for soups, risottos, and hearty meals