
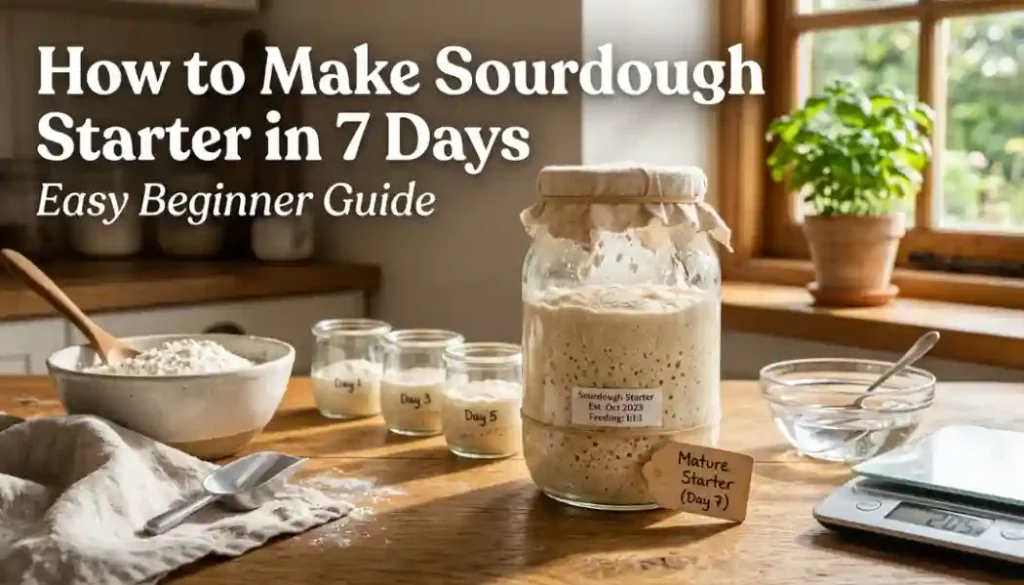
Making your own sourdough starter may seem complicated at first, but it is actually a simple process that anyone can learn. With just flour and water, you can create a thriving homemade sourdough starter powered by wild yeast and natural fermentation. This living culture is the foundation of delicious sourdough bread, giving it its signature flavor, texture, and rise without using commercial yeast.
If you’re wondering how to make a sourdough starter from scratch, this beginner-friendly guide will walk you through every step. You’ll learn the best ingredients to use, how the fermentation process works, and what to expect during each stage of growth. By the end, you’ll know how to create an active sourdough starter, maintain it with a simple feeding schedule, and confidently use it for your future baking projects.
Quick Answer
A sourdough starter is a natural mixture of flour and water that captures wild yeast and beneficial bacteria from the environment. These microorganisms create the fermentation needed to help bread rise without commercial yeast. To make a homemade sourdough starter, mix flour and water in a clean jar and feed it regularly with fresh flour and water.
Most beginners can create an active sourdough starter in about 5 to 7 days, although some starters may take up to 10 days depending on the temperature, flour type, and feeding schedule. A healthy starter should develop plenty of bubbles, rise consistently, and have a pleasant tangy aroma.
The basic process is simple: combine flour and water, let the mixture ferment at room temperature, and feed it daily. Over time, the natural wild yeast starter becomes strong enough to use in sourdough baking. Once your sourdough starter from scratch doubles in size after feeding and shows consistent activity, it is ready to help you bake flavorful homemade bread.
What Is a Sourdough Starter?
A sourdough starter is a living culture made from just flour and water. As the mixture sits, it attracts naturally occurring wild yeast and beneficial bacteria. These microorganisms work together during the fermentation process, creating gas that helps dough rise and developing the unique flavor that makes sourdough bread so popular.
Wild Yeast Explained Simply
Wild yeast is a natural yeast found in the air, on grains, and even on the surface of flour. Unlike commercial yeast, which is manufactured and sold in packets, wild yeast develops naturally inside your starter. When mixed with water and given regular feedings, the yeast begins to grow and multiply.
As the yeast feeds on the carbohydrates in the flour, it produces carbon dioxide bubbles. These bubbles are what make an active sourdough starter rise and become strong enough for baking. This natural process is what makes a natural sourdough starter different from many other bread-making methods.
Why Does a Sourdough Starter Work?
A sourdough starter works because it creates a balanced ecosystem of wild yeast and beneficial bacteria. The yeast provides the leavening power that helps bread rise, while the bacteria produce organic acids that give sourdough its distinctive flavor and aroma.
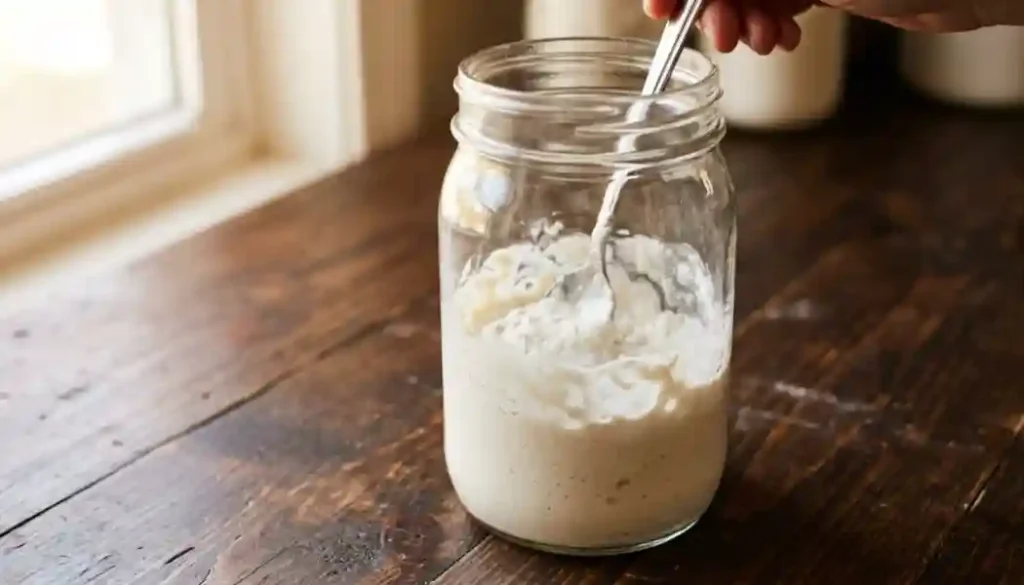
With regular feeding, the microorganisms continue to grow stronger. As fermentation becomes more active, the starter develops more bubbles, rises predictably, and becomes a reliable bread starter for homemade baking. This is why maintaining a proper feeding schedule is important for long-term success.
Sourdough Starter vs. Commercial Yeast
The biggest difference between a sourdough starter and commercial yeast is how they are created and how they affect bread.
| Sourdough Starter | Commercial Yeast |
| Contains wild yeast and beneficial bacteria | Contains a single cultivated yeast strain |
| Created naturally from flour and water | Purchased in packets or jars |
| Takes several days to develop | Works almost immediately |
| Produces complex flavor and aroma | Produces a milder flavor |
| Requires regular feeding and maintenance | Requires no ongoing maintenance |
While commercial yeast offers speed and convenience, a homemade sourdough starter provides deeper flavor, improved texture, and a traditional baking experience. Many bakers prefer creating a sourdough starter from scratch because it allows them to harness the power of natural fermentation and create truly unique loaves of bread.
Equipment You’ll Need
One of the best things about making a sourdough starter from scratch is that you don’t need expensive tools. A few simple kitchen items are enough to create and maintain a healthy sourdough culture.
Essential Equipment
- Glass jar or mason jar – Allows you to easily monitor bubbles and growth.
- Digital kitchen scale – Helps measure flour and water accurately.
- Spoon or spatula – For mixing and feeding.
- Rubber band or marker – Tracks how much your starter rises.
- Loose-fitting lid or breathable cover – Protects the starter while allowing airflow.
While you can measure ingredients with cups, a digital scale provides more consistent results and helps create a stronger active sourdough starter.
Best Flour for a Sourdough Starter
Choosing the right flour can make a big difference when learning how to make a sourdough starter. Different flours contain varying amounts of nutrients, which affect how quickly wild yeast and beneficial bacteria develop.
| Flour Type | Pros | Cons |
| Whole Wheat Flour | Rich in nutrients, encourages fast fermentation | Can create a thicker starter |
| Rye Flour | Extremely active, excellent for developing wild yeast | Strong flavor some beginners may not prefer |
| Bread Flour | Produces a strong and stable starter | Slower to activate than rye |
| All-Purpose Flour | Easy to find and affordable | May take slightly longer to mature |
Whole Wheat Flour
Whole wheat flour is one of the best choices for beginners because it contains more nutrients and natural microorganisms. It often speeds up the fermentation process and helps establish a healthy starter.
Rye Flour
Many experienced bakers consider rye flour the most effective flour for building a new wild yeast starter. It encourages rapid activity and strong fermentation, especially during the first few days.
Bread Flour
Bread flour contains more protein, which can contribute to a stronger and more stable starter over time. It works well after the starter becomes active.
All-Purpose Flour
If you’re looking for an easy and budget-friendly option, all-purpose flour works perfectly. Many successful bakers maintain their homemade sourdough starter using only all-purpose flour.
Best Water for Sourdough Starter
Many guides focus heavily on flour but overlook the importance of water. Since a sourdough starter recipe contains only flour and water, both ingredients matter.

Tap Water
Tap water works well in many locations. If your tap water is safe to drink and doesn’t contain excessive chlorine, it can often be used without problems.
Filtered Water
Filtered water is generally the safest option because it removes many impurities while preserving the minerals that support healthy fermentation. Many bakers prefer filtered water when making a natural sourdough starter.
Chlorine Concerns
High levels of chlorine may slow the growth of wild yeast and beneficial bacteria. If you’re unsure about your local water quality:
- Use filtered water.
- Let tap water sit uncovered for several hours before use.
- Avoid heavily chlorinated water whenever possible.
Using good-quality water can improve the consistency and strength of your sourdough starter from scratch.
Before You Start: Understanding the 7-Day Process
Before you begin, it’s helpful to understand what happens inside your starter. Many beginners worry when activity changes during the first week, but these changes are completely normal.
What Happens During Fermentation?
When flour and water are combined, naturally occurring wild yeast and beneficial bacteria begin feeding on the carbohydrates in the flour. As they consume these nutrients, they produce gases and acids.
This fermentation process creates:
- Bubbles
- Rise and expansion
- Tangy aromas
- Improved microbial balance
Over time, the yeast population becomes stronger, creating a healthy bread starter ready for baking.
Why Activity Changes From Day to Day
One of the biggest surprises for beginners is that the starter often becomes very active and then suddenly slows down.
This happens because different microorganisms become active at different stages. Early bacteria create rapid activity, but later, the desirable wild yeast population takes over. This transition can temporarily make the starter seem inactive even though it is developing normally.
Understanding this process helps prevent one of the most common mistakes: throwing away a starter that is actually progressing as expected.
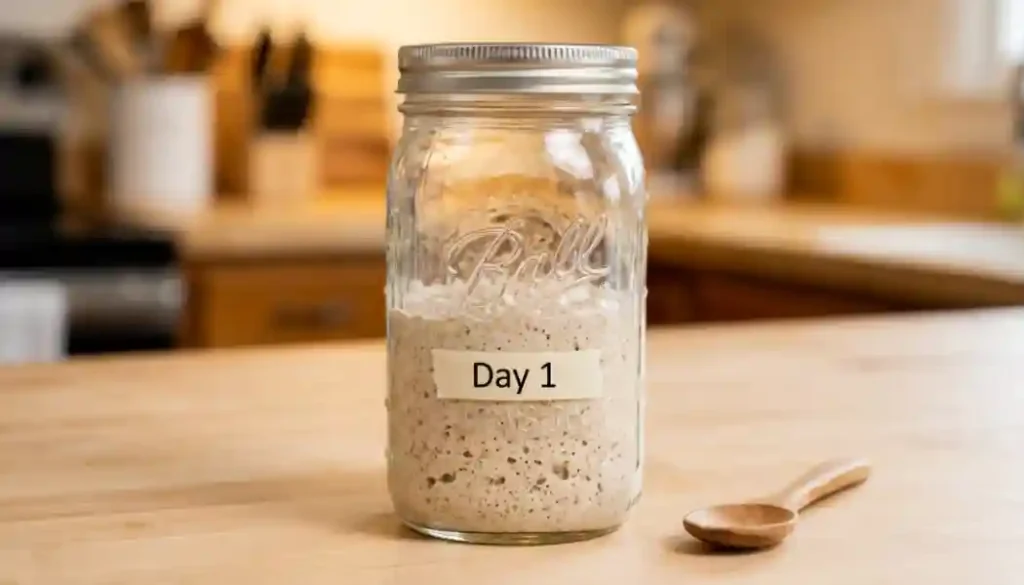
Day 1: Mix Your Starter
On Day 1, combine:
- 60 grams whole wheat flour (or rye flour)
- 60 grams water
Mix thoroughly until no dry flour remains. The mixture should resemble a thick batter.
Transfer it to a clean glass jar, loosely cover it, and leave it at room temperature for 24 hours.
At this stage, you probably won’t see much activity. The goal is simply to begin developing the wild yeast starter.
Day 2: First Signs of Activity
After 24 hours, you may begin noticing:
- Small bubbles
- Slight expansion
- Mild fermentation smell
These are positive signs that microorganisms are becoming active.
Discard about half of the mixture and feed the remainder with equal amounts of fresh flour and water.
This feeding introduces new nutrients and encourages further growth of the developing sourdough culture.
Day 3: Why Your Starter May Seem Dead
Day 3 often causes the most concern for beginners.
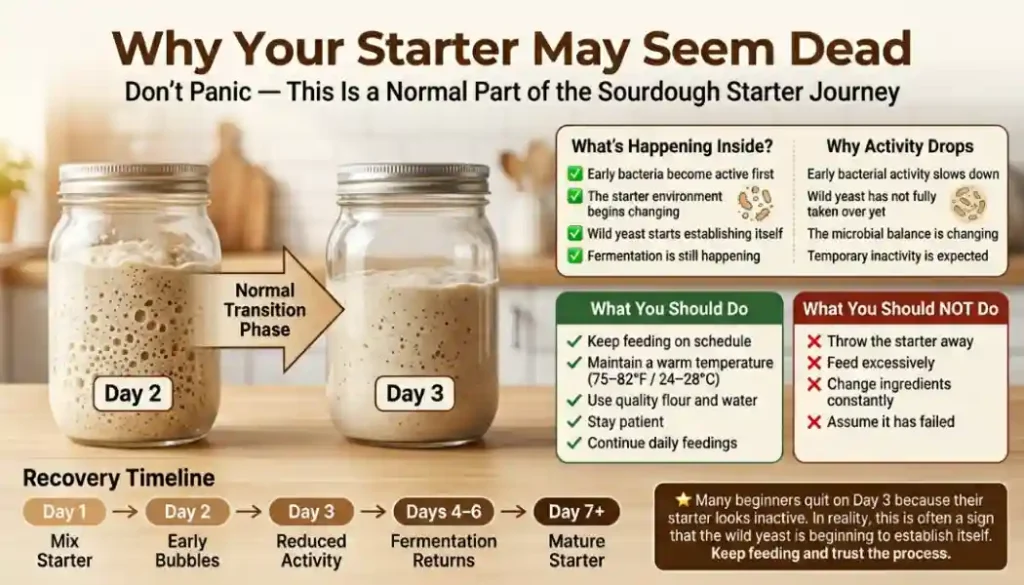
You may notice:
- Fewer bubbles
- Less rise
- Reduced activity
This stage is completely normal.
Many people think their homemade sourdough starter has failed, but the microbial community is simply shifting. The early bacteria are declining while the beneficial yeast and bacteria continue establishing themselves.
Keep following your feeding schedule and avoid making drastic changes.
Day 4: Continue Feeding
By Day 4, the starter should begin showing more consistent signs of fermentation.
Look for:
- Small to medium bubbles
- Slight growth after feeding
- A mildly sour aroma
Continue feeding every 24 hours using equal parts flour and water.
Consistency is more important than perfection. Regular feedings help strengthen the active sourdough starter and encourage stable fermentation.
Day 5: Building Strength
At this stage, many starters become noticeably more active.
You may observe:
- Faster growth
- More bubbles throughout the jar
- Improved aroma
- Better rise after feeding
The wild yeast population is becoming stronger and more balanced. Continue feeding on schedule and maintain a stable room temperature.
If your kitchen is cool, development may take slightly longer.
Day 6: Watching for Consistency
By Day 6, focus less on individual bubbles and more on consistent performance.
Ask yourself:
- Does it rise after feeding?
- Does it produce bubbles daily?
- Does it smell pleasantly sour?
- Is activity becoming predictable?
A healthy natural sourdough starter should begin showing reliable growth patterns, even if it has not fully matured yet.
Day 7 and Beyond: Is It Ready?
Many starters become ready between Days 7 and 10, although timing varies.
Your sourdough starter is usually ready to bake with when it:
- Doubles in size after feeding
- Contains plenty of bubbles
- Rises consistently
- Has a pleasant tangy aroma
- Shows strong fermentation activity
If your starter hasn’t reached this stage yet, continue feeding daily. Some starters simply need more time.
Remember, creating a strong homemade sourdough starter is not about speed—it’s about developing a healthy and stable culture that will support successful sourdough baking for years to come.
Ingredients You’ll Need
One of the reasons many people love learning how to make a sourdough starter is its simplicity. Unlike many baking recipes, a homemade sourdough starter requires only two ingredients: flour and water. Together, these ingredients create the perfect environment for wild yeast and beneficial bacteria to grow.
Ingredients
- 60 grams whole wheat flour, rye flour, bread flour, or all-purpose flour
- 60 grams filtered or room-temperature water
While any flour can work, many beginners have better success starting with whole wheat flour or rye flour because they contain more nutrients that support fermentation. As your sourdough culture becomes stronger, you can switch to all-purpose flour or bread flour if desired.
Using quality ingredients from the start helps create a healthy wild yeast starter and supports consistent fermentation throughout the first week.
Sourdough Starter Timeline at a Glance
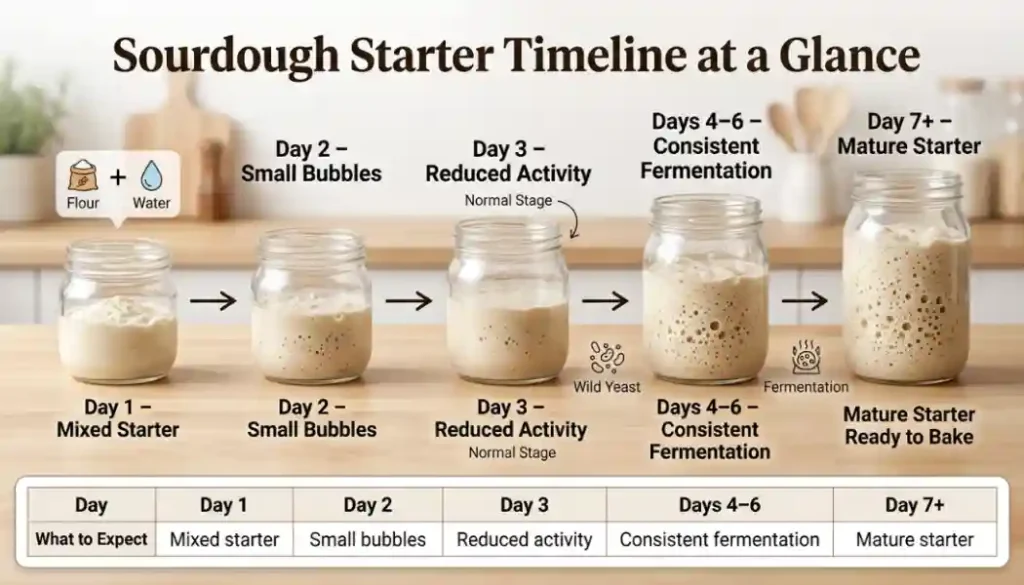
Creating a sourdough starter from scratch is a gradual process. Understanding what to expect each day can help you avoid unnecessary worry and stay on track.
| Day | What to Expect |
| Day 1 | Mixed starter with little visible activity |
| Day 2 | Small bubbles may begin to appear |
| Day 3 | Reduced activity or fewer bubbles |
| Days 4–6 | Consistent fermentation and gradual growth |
| Day 7+ | Mature starter with reliable rise and bubbles |
Every kitchen is different, so don’t worry if your timeline varies slightly. Factors like room temperature, flour type, and feeding consistency can affect how quickly your active sourdough starter develops.
How to Tell If Your Sourdough Starter Is Healthy
A healthy natural sourdough starter should show clear signs of life and fermentation. While every starter behaves a little differently, there are several indicators that your culture is thriving.
Signs of a Healthy Starter
- Lots of bubbles throughout the jar
- Consistent rise after feeding
- Pleasant tangy or slightly fruity aroma
- Smooth, stretchy texture
- Predictable activity every day
- No signs of mold or unusual colors
Remember that a healthy starter doesn’t need to look perfect. The goal is steady growth and reliable fermentation, not constant expansion.
If your bread starter consistently rises and develops bubbles after feeding, you’re moving in the right direction.
Signs Your Sourdough Starter Is Ready to Bake With
Many beginners ask, “How do I know when my sourdough starter is ready?” Fortunately, there are several easy ways to tell.
Your active sourdough starter is generally ready for baking when it:
- Doubles in size within 4–8 hours after feeding
- Contains plenty of bubbles on the surface and sides
- Has a pleasantly sour aroma
- Rises and falls predictably
- Shows strong fermentation activity day after day
Some bakers also perform a float test, where a small spoonful of starter is placed in water. If it floats, it may contain enough gas to help bread rise. However, consistent growth and activity are usually more reliable indicators than the float test alone.
A mature sourdough starter recipe should feel lively, active, and dependable before you use it for sourdough baking.
Common Sourdough Starter Problems and Solutions
Even healthy starters can experience temporary issues. The good news is that most problems have simple solutions.
Starter Not Bubbling
If your sourdough starter is not bubbling, several factors may be responsible.
Possible Causes
- Cool room temperature
- Inconsistent feeding
- Chlorinated water
- Starter is still developing
Solutions
- Move the starter to a warmer location.
- Feed it consistently every day.
- Use filtered water if possible.
- Be patient and allow more time for fermentation.
Many starters need more than 7 days to become fully active.
Starter Rises Then Falls
A starter that rises and then collapses is usually behaving normally.
Why It Happens
The wild yeast consumes available food and produces gas. Once the food supply decreases, the starter naturally falls.
What To Do
- Continue your normal feeding schedule.
- Feed the starter after it peaks and begins to fall.
- Don’t mistake this process for failure.
In fact, rise-and-fall cycles are often signs of a healthy sourdough culture.
Starter Smells Strange
A developing starter can produce a variety of odors.
Common Smells
- Tangy
- Fruity
- Yogurt-like
- Slightly acidic
These are usually normal signs of fermentation.
However, strong rotten odors or visible mold may indicate contamination.
Watery Starter
A layer of liquid on top of your starter is commonly called hooch.
Possible Causes
- Missed feedings
- Warm temperatures
- Hungry starter
Solution
Pour off the liquid or stir it back in, then feed the starter as usual.
A watery starter often simply means your homemade sourdough starter needs fresh flour and water.
Mold Growth
Mold is one problem that should never be ignored.
Signs of Mold
- Pink streaks
- Orange patches
- Green, black, or fuzzy growth
If mold appears, discard the starter immediately and begin a new sourdough starter from scratch.
Proper hygiene and clean equipment greatly reduce the risk of contamination.
Sourdough Starter Smell Guide
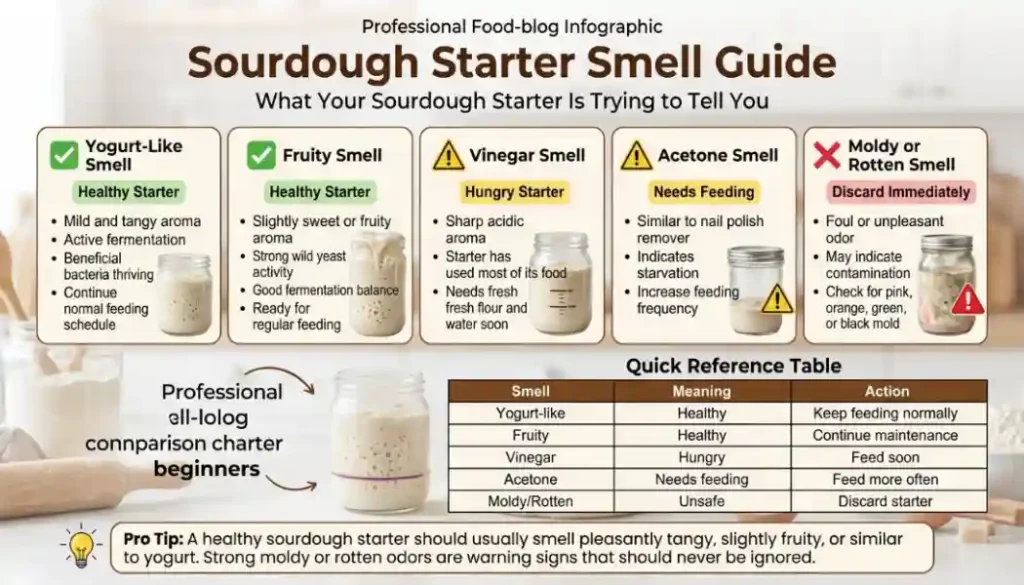
The aroma of a sourdough starter can reveal a lot about its health and feeding needs. Understanding these smells helps you recognize whether your starter is thriving or needs attention.
| Smell | Meaning |
| Yogurt-like | Healthy fermentation |
| Fruity | Healthy and active starter |
| Vinegar | Starter is hungry and needs feeding |
| Acetone (nail polish smell) | Starter needs more frequent feeding |
| Moldy or rotten smell | Discard the starter |
Why Smells Matter
During fermentation, wild yeast and beneficial bacteria produce different acids and compounds. These create the distinctive aromas associated with a healthy natural sourdough starter.
A mildly sour, fruity, or yogurt-like smell is usually a sign that your starter is developing correctly. On the other hand, strong acetone odors often indicate the starter has exhausted its food supply and needs a fresh feeding.
Learning to recognize these scents is one of the easiest ways to monitor the health of your active sourdough starter and maintain a successful feeding schedule.
Best Temperature for Sourdough Starter
Temperature plays a major role in how quickly your sourdough starter develops. Even the best sourdough starter recipe can struggle if the environment is too cold or too hot.
Ideal Temperature Range
| Temperature | What Happens |
| Below 68°F (20°C) | Slow fermentation and slower growth |
| 70–75°F (21–24°C) | Good fermentation activity |
| 75–82°F (24–28°C) | Ideal range for most starters |
| Above 85°F (29°C) | Faster fermentation but increased risk of over-fermentation |
For most home bakers, keeping a homemade sourdough starter between 75°F and 82°F (24°C–28°C) produces the most reliable results.
If your kitchen is cool, try placing the starter:
- Near a warm appliance
- Inside a turned-off oven with the light on
- In a warm pantry
A stable temperature helps wild yeast thrive and creates a stronger, more predictable active sourdough starter.
How Often Should You Feed a Sourdough Starter?
A sourdough starter needs regular feeding to stay healthy. Feeding provides fresh nutrients for the wild yeast and beneficial bacteria that drive fermentation.
During Starter Development
While creating a sourdough starter from scratch, feed it every 24 hours.
Once Fully Mature
If kept at room temperature:
- Feed every 12–24 hours
If stored in the refrigerator:
- Feed once per week
The exact schedule depends on temperature, flour type, and how often you bake. Consistent feeding helps maintain a healthy sourdough culture and prevents your starter from becoming weak or sluggish.
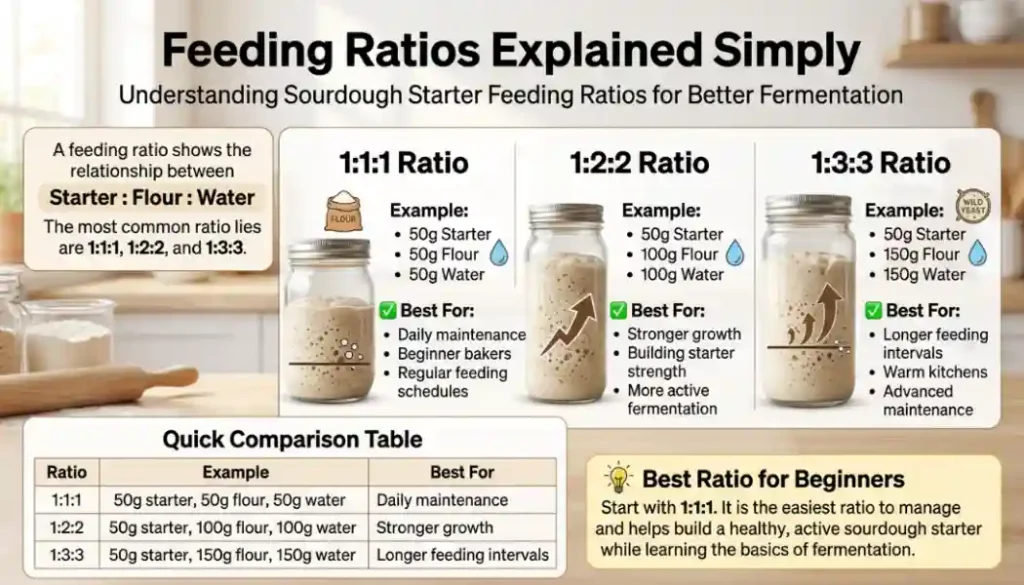
Feeding Ratios Explained Simply
Many beginners are confused by feeding ratios, but they are actually very simple.
A feeding ratio compares the amount of starter, flour, and water.
Common Feeding Ratios
| Ratio | Example | Best For |
| 1:1:1 | 50g starter, 50g flour, 50g water | Daily maintenance |
| 1:2:2 | 50g starter, 100g flour, 100g water | Stronger growth |
| 1:3:3 | 50g starter, 150g flour, 150g water | Longer feeding intervals |
Which Ratio Should Beginners Use?
For most people learning how to make a sourdough starter, a simple 1:1:1 ratio works perfectly.
As your starter becomes stronger, you can experiment with larger feedings to improve activity and flexibility.
How to Store a Sourdough Starter
Once your active sourdough starter is mature, proper storage becomes important.
Room Temperature Storage
Choose this option if you bake frequently.
- Feed every day.
- Keep the starter loosely covered.
- Store in a stable environment.
Refrigerator Storage
Ideal for occasional bakers.
- Feed the starter.
- Let it sit at room temperature for a few hours.
- Place it in the refrigerator.
- Feed once every week.
Refrigeration slows fermentation while helping preserve your natural sourdough starter for long-term use.
How to Revive a Neglected Sourdough Starter
One of the biggest myths is that a forgotten starter is automatically ruined. In reality, many neglected starters can be revived with patience.
Signs a Starter Can Still Be Saved
- No mold present
- No pink or orange discoloration
- Sour or acidic smell only
- Some visible activity remains
Steps to Revive a Starter
- Remove most of the old starter.
- Keep a small amount (about 25–50 grams).
- Feed with fresh flour and water.
- Continue daily feedings.
- Keep the starter warm.
Within several days, many weak starters regain strength and become active again.
Reviving a neglected wild yeast starter is often easier than starting over completely.
What Is Sourdough Discard?
Sourdough discard is the portion of starter removed before feeding.
When maintaining a starter, you cannot continually add flour and water without removing some of the existing mixture. The removed portion is called discard.
Discard is not waste. Although it may not have enough strength to raise bread on its own, it still contains flavor and can be used in many recipes.
Understanding sourdough discard is an important part of maintaining a healthy sourdough starter recipe.
Easy Ways to Use Sourdough Discard
Instead of throwing discard away, consider using it in other recipes.
Popular Uses for Sourdough Discard
Using discard helps reduce waste while adding a subtle tangy flavor to baked goods.
Many bakers discover that discard recipes become just as enjoyable as traditional sourdough baking.
Beginner Mistakes to Avoid
Learning how to make a sourdough starter at home is straightforward, but several common mistakes can slow progress.
1. Expecting Results Too Quickly
Many starters need 7–10 days or longer before they become fully mature.
2. Changing the Feeding Schedule Constantly
Consistency is more important than perfection.
3. Using Extremely Cold Temperatures
Cool environments slow fermentation and yeast activity.
4. Throwing Away the Starter Too Early
Temporary inactivity during the first week is completely normal.
5. Ignoring Water Quality
Highly chlorinated water may interfere with the growth of wild yeast.
6. Using Dirty Equipment
Clean jars and utensils help prevent contamination.
Avoiding these mistakes can significantly improve your success with a homemade sourdough starter.
Expert Tips for a Stronger Starter
If you want a more active and reliable starter, these simple tips can help.
Use Whole Wheat or Rye Flour Early On
These flours contain extra nutrients that encourage faster microbial growth.
Keep Temperatures Consistent
Stable temperatures support predictable fermentation.
Feed on a Regular Schedule
Yeast and bacteria thrive when they receive consistent feedings.
Use a Digital Scale
Accurate measurements improve consistency and make troubleshooting easier.
Watch Patterns, Not Individual Bubbles
Healthy starters develop predictable rise-and-fall cycles over time.
Be Patient
Perhaps the most important tip of all: a strong sourdough culture develops gradually. Giving it time is often the secret to success.
Key Takeaways
- A sourdough starter is a living culture made from flour and water.
- Wild yeast and beneficial bacteria naturally develop through fermentation.
- Most starters become active within 5–7 days, though some take longer.
- Consistent feeding and proper temperature are essential for success.
- Whole wheat and rye flour often encourage faster starter development.
- A healthy starter should bubble, rise after feeding, and smell pleasantly tangy.
- Sourdough discard can be used in many recipes instead of being thrown away.
- Many neglected starters can be revived with patience and regular feedings.
- Avoid common beginner mistakes such as inconsistent feeding and poor temperature control.
- Once mature, your active sourdough starter can be maintained for years and used to create flavorful homemade sourdough bread.
FAQs
How long does it take to make a sourdough starter?
Most starters become active within 5 to 7 days, but some may require 10 days or longer depending on temperature, flour choice, and feeding consistency.
Can I make a sourdough starter with all-purpose flour?
Yes. All-purpose flour can successfully create and maintain a healthy sourdough starter, although whole wheat or rye flour may speed up fermentation during the early stages.
Why isn’t my sourdough starter bubbling?
Common causes include cool temperatures, inconsistent feeding, chlorinated water, or simply not enough time. Continue feeding regularly and be patient.
Can I use tap water for sourdough starter?
Yes, in many areas. However, if your tap water contains high levels of chlorine, filtered water may produce better results.
Can a sourdough starter die?
Yes, especially if mold develops or it is neglected for a very long time. Fortunately, many weak starters can be revived with regular feedings.
What does a healthy sourdough starter smell like?
A healthy starter often smells mildly sour, fruity, tangy, or yogurt-like. Strong moldy or rotten odors are warning signs that the starter should be discarded.
Final Thoughts
Learning how to make a sourdough starter is one of the most rewarding skills for any home baker. While the process requires a little patience, it is surprisingly simple. With just flour and water, you can create a thriving homemade sourdough starter powered by natural wild yeast and fermentation.
Don’t worry if your starter doesn’t behave exactly like someone else’s. Every sourdough starter from scratch develops at its own pace depending on factors like temperature, flour choice, and feeding consistency. The key is to stay patient, follow a regular feeding schedule, and watch for steady signs of growth rather than expecting overnight results.
Once your active sourdough starter is mature, it can last for years with proper care and become the foundation for countless loaves of delicious sourdough bread. Whether you’re baking your first loaf or starting a long-term baking journey, a healthy starter is the first step toward better homemade bread and a deeper understanding of the art of fermentation.