
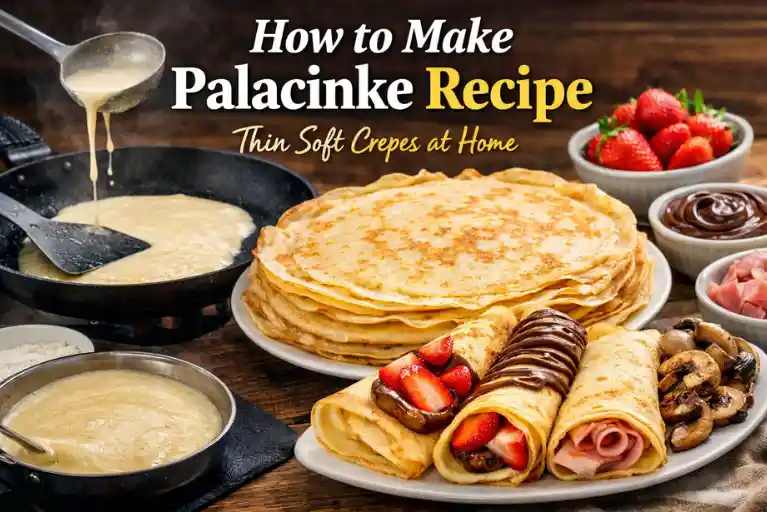
If you’re looking for an easy, authentic palacinke recipe, you’re in the right place. These thin, soft Balkan crepes are loved across Serbia, Croatia, and beyond for their simple ingredients and quick cooking method. Unlike thick pancakes, palacinke are light, flexible, and perfect for both sweet and savory fillings.
In this guide, you’ll learn how to make palacinke step by step, even if you’re a beginner. We’ll also cover the secret to smooth, lump-free batter, how to get that perfect thin texture, and tips to avoid common mistakes like sticking or tearing. Whether you want a traditional palacinke recipe or a quick homemade version, this guide keeps things simple and clear.
By the end, you’ll be able to make perfect palacinke at home every time—just like authentic Balkan kitchens.
Quick Answer: What Is Palacinke?
Palacinke are thin, soft Balkan crepes made from a simple batter of flour, eggs, milk, and water, cooked quickly in a lightly greased pan. Unlike thick pancakes, palacinke are delicate, flexible, and spread very thin, making them perfect for rolling or folding with sweet or savory fillings.
Why You’ll Love This Palacinke Recipe

You might also like: How to Freeze Tofu Recipe
- Simple ingredients, big flavor
This authentic palacinke recipe uses basic pantry staples like flour, eggs, and milk—nothing complicated, just real food. - Ready in minutes
The batter comes together quickly, and each crepe cooks in under a minute, making it a perfect easy palacinke recipe for busy days. - Sweet + savory versatility
Enjoy palacinke with Nutella, jam, fruit, or go savory with cheese and ham—endless options in one recipe. - Beginner-friendly method
Even if it’s your first time making homemade crepes, this step-by-step guide makes it simple to get thin, soft, perfect palacinke every time.
What Are Palacinke? (Origin + Cultural Context)
Palacinke are a traditional Balkan crepes recipe that comes from countries like Serbia, Croatia, and Slovenia. These thin, soft pancakes are a big part of everyday cooking and are often made at home because they are quick, affordable, and satisfying.
In Balkan culture, palacinke are enjoyed in many ways. They can be served as a sweet dessert with chocolate or jam, a light breakfast, or even a savory dinner filled with cheese, meat, or vegetables. Their flexibility is what makes this authentic palacinke recipe so popular across generations.
Palacinke vs Crepes vs Pancakes
Understanding the difference helps you master the perfect palacinke recipe.
- Texture
Palacinke and crepes are soft and flexible, while pancakes are thick and fluffy. - Thickness
Palacinke are very thin, even thinner than most crepes, while pancakes are much thicker and heavier. - Cooking method
Palacinke use a runny batter spread quickly across a hot pan, while pancakes use a thicker batter poured in one spot. - When to use each
- Palacinke → best for rolling with fillings
- Crepes → similar, slightly thicker option
- Pancakes → best for stacking and syrup
This is why palacinke are often called European crepes, but they have their own unique style and tradition.
Ingredients for the Perfect Palacinke Batter
A great palacinke batter recipe is simple but requires the right balance for that thin, smooth texture.
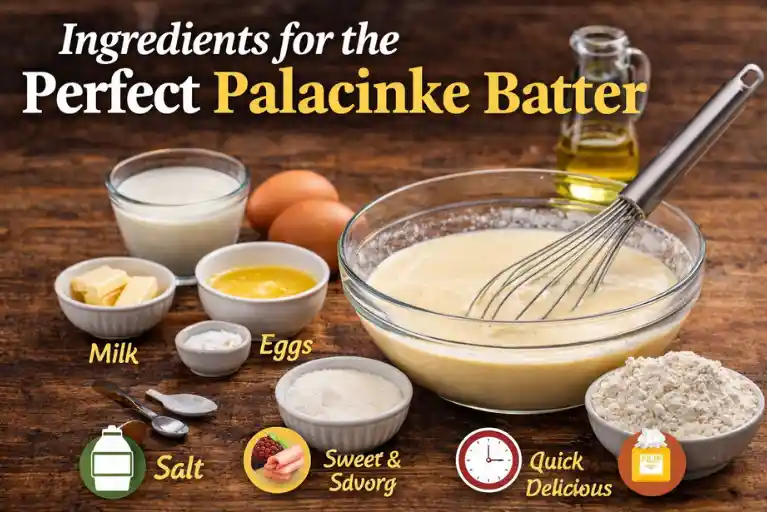
Essential Ingredients
- Flour – gives structure
- Eggs – adds richness and flexibility
- Milk – creates a smooth batter
- Water – helps make the batter thinner
- Salt – enhances flavor
- Oil or butter – prevents sticking
These basic ingredients create a simple crepe batter that cooks into soft, delicate layers.
Optional Add-Ins
- Sugar – for sweet palacinke
- Vanilla extract – adds aroma
- Sparkling water – makes batter lighter
Substitutions (Gluten-Free, Dairy-Free)
- Gluten-free flour → for a gluten-free palacinke recipe
- Plant-based milk (almond, oat) → for dairy-free option
- Water-only batter → lighter, more traditional variation
These swaps make it easy to customize your homemade palacinke recipe without losing the classic taste.
The Big Secret to Perfect Palacinke (Technique Breakdown )
Making perfect palacinke is not about fancy ingredients—it’s all about technique.
- Batter thinness (critical)
The key to an authentic palacinke recipe is a thin, pourable batter. If it’s too thick, your crepes will turn heavy instead of light and flexible. - Heat control
Use medium heat. Too hot, and the crepes burn. Too low, and they become dry and rubbery. Proper heat gives you that soft texture with light golden edges. - Pan surface importance
A non-stick pan or well-seasoned pan is essential. This prevents sticking and helps you cook thin crepes evenly without tearing.
Perfect Batter Consistency
Getting the right consistency is what separates average results from perfect homemade palacinke.
- How thin it should be
The batter should look like heavy cream—smooth, slightly runny, and easy to pour. It should spread quickly across the pan without effort.
How to Fix Common Batter Problems
- Thick batter
Add a little milk or water, one tablespoon at a time, until the batter becomes smooth and pourable. - Lumpy batter
Whisk well or use a blender to create a lump-free mixture. Letting the batter rest for a few minutes can also help smooth it out.
A smooth batter is the foundation of a successful palacinke batter recipe.
Step-by-Step: How to Make Palacinke (Foolproof Method)
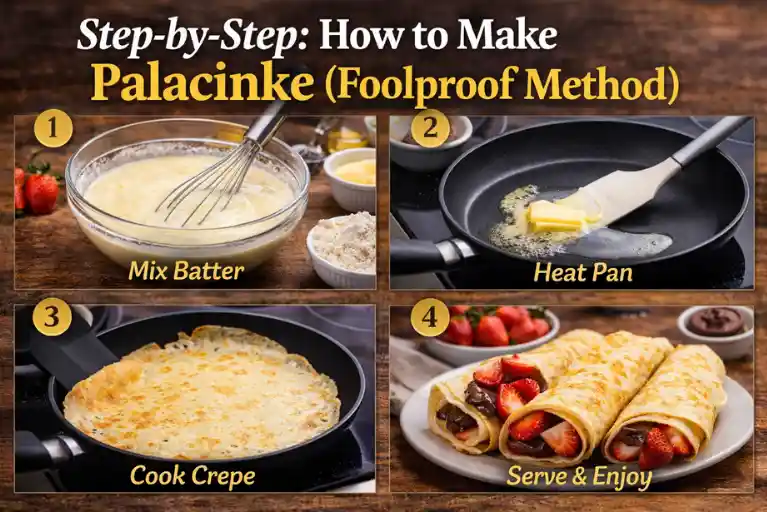
Follow this easy palacinke recipe step by step for consistent results every time.
Step 1 – Mix Smooth Batter
In a bowl, whisk together flour, eggs, milk, and water until you get a smooth, lump-free batter. This is the base of your simple crepe batter.
Step 2 – Rest or Skip? (Quick decision guide)
- Rest (10–15 minutes) → better texture, softer crepes
- Skip → still works if you’re short on time
Resting helps improve the flexibility of palacinke, but it’s optional.
Step 3 – Heat the Pan Correctly
Preheat a non-stick pan over medium heat and lightly grease it with oil or butter. Proper heat ensures even cooking and prevents sticking.
Step 4 – Pour & Spread Like a Pro
Pour a small amount of batter into the pan, then quickly tilt and swirl to create a thin, even layer. This is the key technique in making thin crepes at home.
Step 5 – Flip Without Breaking
Cook for about 30–60 seconds, then gently flip using a spatula or your fingers. Cook the other side briefly until lightly golden. With practice, you’ll master the flipping technique and get perfect palacinke every time.
How to Get Thin, Soft, Restaurant-Style Palacinke
If you want restaurant-quality palacinke, focus on these small but powerful techniques:
- Ladle control
Use a small ladle and pour just enough batter to lightly cover the pan. Too much batter = thick crepes. Perfect control gives you thin, delicate layers. - Pan tilt technique
As soon as you pour, quickly tilt and rotate the pan in a circular motion. This spreads the batter into a smooth, even layer—the secret behind thin crepes at home. - Timing tips
Cook each side for 30–60 seconds only. Overcooking leads to dry or rubbery texture. The goal is soft, flexible palacinke with light golden edges.
Pro Tips Nobody Tells You
These small insights make a big difference in your homemade palacinke recipe:
- Why the first crepe always fails
The pan is still adjusting to the heat and oil. Think of the first one as a test crepe—totally normal! - Oil vs butter debate
- Oil → better for even cooking and prevents sticking
- Butter → adds flavor but can burn quickly
Best option: use oil for cooking, add butter later for taste
- Best pan type
A non-stick pan or crepe pan works best. It ensures easy flipping and prevents tearing, especially for beginners learning how to make palacinke.
Common Mistakes
Avoid these common issues to get perfect palacinke every time:
- Sticky pan
Cause: not enough oil or wrong pan
Fix: lightly grease the pan and use a non-stick surface - Thick crepes
Cause: batter too thick or too much poured
Fix: add liquid and use less batter for a thin pancake recipe - Rubbery texture
Cause: overcooking or low heat
Fix: cook quickly on medium heat for soft results - Breaking when flipping
Cause: batter too thin or crepe undercooked
Fix: wait until edges lift slightly before flipping
Best Fillings for Palacinke (Sweet + Savory)
One of the best things about palacinke is how versatile they are. You can enjoy them in many delicious ways.
Sweet Fillings
- Nutella – classic favorite
- Jam – strawberry, apricot, or raspberry
- Fresh fruit – bananas, berries
- Sugar or powdered sugar – simple and traditional
These options make sweet palacinke perfect for dessert or breakfast.
Savory Fillings
- Cheese – soft cheese or cream cheese
- Ham – paired with cheese for a classic combo
- Mushrooms – sautéed for a rich flavor
Savory versions turn this easy palacinke recipe into a light lunch or dinner.
When to Serve Palacinke Recipe

One of the best things about this palacinke recipe is how flexible it is—you can enjoy it any time of the day.
- Breakfast
Serve sweet palacinke with jam, fruit, or Nutella for a light and satisfying start to your day. - Dessert
Add chocolate spread, powdered sugar, or cream to turn them into a quick and delicious Balkan-style dessert. - Dinner (savory version)
Fill with cheese, ham, or mushrooms for a simple, comforting meal. Savory palacinke are a popular dinner option in many Balkan homes.
Variations You Can Try
You can easily adapt this homemade palacinke recipe to suit different diets and preferences.
- Gluten-free palacinke
Use gluten-free flour to make a version that still stays soft and flexible. - Dairy-free option
Replace milk with almond, oat, or soy milk for a light and plant-based alternative. - High-protein version
Add a bit of protein powder or extra eggs to boost nutrition while keeping the texture smooth.
These variations help you customize your easy palacinke recipe without losing its authentic feel.
Are Palacinke Healthy?
- Calories overview
A basic palacinke recipe is relatively light, especially compared to thick pancakes. Each crepe is usually low in calories depending on the fillings you choose. - Comparison with pancakes
- Palacin → thinner, lighter, less dense
- Pancakes → thicker, heavier, often higher in calories
When kept simple, palacinke can be a healthier option, especially with fresh fruit or light fillings.
Storage, Reheating & Make-Ahead Tips
Knowing how to store your palacinke properly helps keep them fresh and soft.
- Fridge storage
Stack the crepes and store them in an airtight container for up to 2–3 days. - Freezing
Place parchment paper between each crepe and freeze for up to 2 months. This is perfect for meal prep. - Reheating without drying
Warm them in a pan on low heat or microwave briefly with a damp cover to keep them soft and flexible.
These tips make it easy to prepare your palacinke batter recipe ahead of time and enjoy fresh crepes anytime.
FAQs About Palacinke Recipe
Are palacinke the same as crepes?
Palacinke and crepes are very similar, but not exactly the same. Palacinke are usually thinner, softer, and more flexible, while French crepes can be slightly thicker. Both use a simple crepe batter, but palacinke are known for their Balkan-style preparation and fillings.
Why are my palacinke thick?
If your palacinke are thick, your batter is likely too dense. Add a little milk or water to make it more runny. Also, use less batter in the pan and spread it quickly for a proper thin pancake recipe.
Can I make batter ahead of time?
Yes, you can prepare your palacinke batter recipe ahead of time. Store it in the fridge for up to 24 hours. Stir well before using to keep the batter smooth and consistent.
What pan is best for palacinke?
A non-stick pan or a dedicated crepe pan works best. It helps create thin, even palacinke and makes flipping easier without sticking or tearing.
Can I skip resting the batter?
Yes, you can skip resting, and your easy palacinke recipe will still work. However, resting for 10–15 minutes helps create a smoother batter and softer texture.
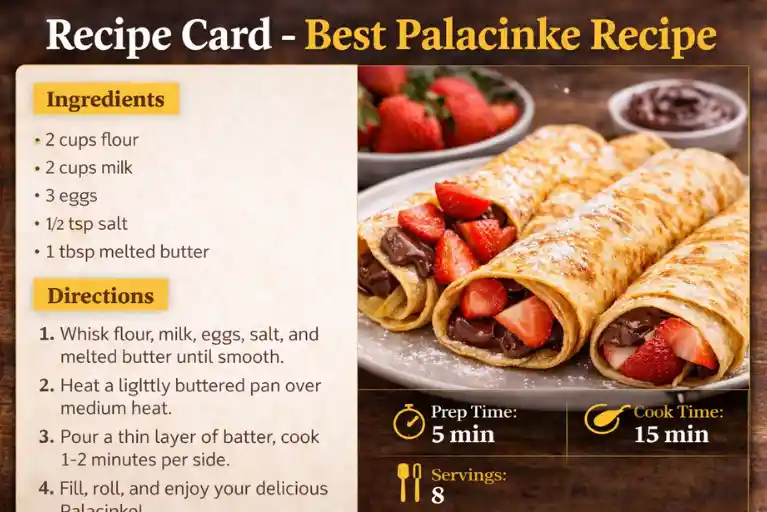
Recipe Card – Best Palacinke Recipe
Course: EuropeanCuisine: Breakfast, DessertDifficulty: Easy4
servings10
minutes15
minutes90
kcalIngredients
1 cup all-purpose flour
2 eggs
1 cup milk
½ cup water
1 tbsp oil or melted butter
Pinch of salt
(Optional) 1 tsp sugar or vanilla
Instructions
- In a bowl, whisk together flour, eggs, milk, and water until you get a smooth, lump-free batter.
- Add oil and salt, then mix again.
- Heat a non-stick pan over medium heat and lightly grease it.
- Pour a small amount of batter and quickly tilt the pan to spread it thin.
- Cook for 30–60 seconds, then flip and cook the other side briefly.
- Repeat with the remaining batter and stack your palacinke.
- Nutrition (Per Serving – Approximate)
Calories: 90
Carbohydrates: 12g
Protein: 3g
Fat: 3g
Recipe Video
Notes
- Batter consistency is key
Your batter should be thin and pourable like heavy cream. This is the secret to getting perfect thin palacinke instead of thick pancakes. - Resting improves texture
Letting the batter rest for 10–15 minutes helps create softer, more flexible crepes, but you can skip it if you’re short on time. - First crepe is a test
Don’t worry if the first one doesn’t turn out perfect. It helps you adjust heat and pan control. - Use the right pan
A non-stick pan or crepe pan makes flipping easier and prevents sticking—especially important for beginners. - Control the heat
Cook on medium heat for best results. High heat burns, low heat makes crepes dry or rubbery. - Keep crepes soft
Stack cooked palacinke and cover them lightly to retain moisture and flexibility. - Adjust as you go
If your crepes are too thick, add a little milk or water. If too thin, add a small amount of flour. - Best served fresh
Palacinke taste best when warm, filled with your favorite sweet or savory fillings.
Final Thoughts
Now that you know how to make palacinke at home, don’t be afraid to experiment and make them your own. Try different flavors, adjust the batter, and explore both sweet and savory palacinke ideas to find what you love most.
Start simple with Nutella, jam, or fresh fruit, then move on to savory options like cheese, ham, or mushrooms. This easy palacinke recipe is all about flexibility, so you can enjoy it any time of the day.
If you enjoyed this guide, check out our other recipes like easy crepes, pancake variations, and quick breakfast ideas to keep your kitchen inspiration going.