

As of April 02, 2026, eyeball cake pops are trending as one of the most viral Halloween desserts—combining spooky visuals with easy, beginner-friendly baking.
These aren’t just regular cake pops…
They’re eye-catching, party-ready treats that look scary, taste amazing, and are incredibly fun to make.
From perfectly smooth coating techniques to realistic eyeball designs, this guide will show you how to create bakery-quality Halloween cake pops at home—even if you’re a beginner.
Whether you want spooky, cute, or viral-worthy treats, this is your complete step-by-step expert guide.
Quick Answer: How to Make Eyeball Cake Pops?
To make eyeball cake pops, crumble baked cake and mix with frosting to form dough. Shape into balls, insert sticks, dip in melted white candy melts, and decorate with candy eyes and red gel icing. Chill until set for smooth, professional-looking Halloween cake pops.
Ingredients You’ll Need for Eyeball Cake Pops
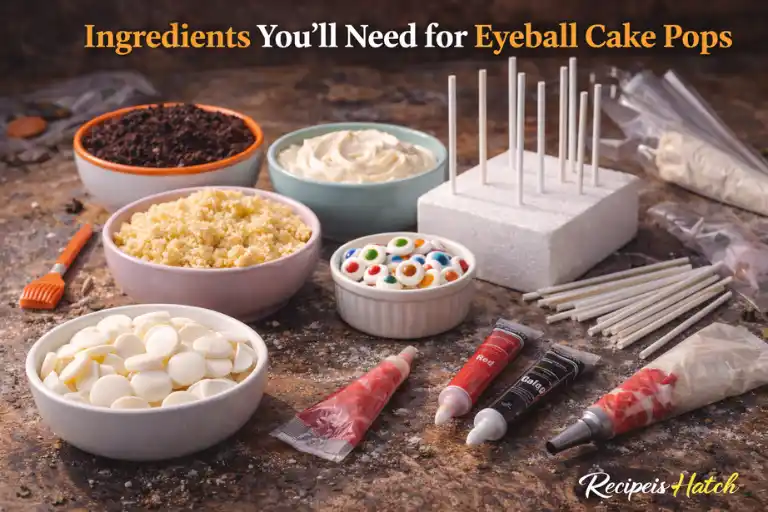
Before you start making your eyeball cake pops, it’s important to gather all the right ingredients and tools. For the cake base, you can choose from red velvet, chocolate, or madeira cake—or even use leftover cake crumbs. These flavors work perfectly to create delicious, moist pops.
For the coating, you’ll need white chocolate or candy melts in your preferred colors. These help give your pops a smooth, even finish and make decorating easy.
When it comes to decorations, grab candy eyeballs, gel icing, and edible markers to create realistic or fun spooky designs.
Finally, make sure you have the right tools: cake pop sticks, a styrofoam stand to hold the pops while drying, small brushes, and piping bags for detailed designs. Having all these on hand makes creating Halloween eyeball cake pops simple and fun.
You might also like: Smoke a Leg of Lamb
Chocolate Cake
- 7 ounces all-purpose flour
- 1 cup sugar
- 3 ounces cocoa powder
- 1 teaspoon baking soda
- ½ teaspoon baking powder
- ½ teaspoon salt
- 1 large egg
- ½ cup buttermilk
- ¼ cup vegetable oil
- ½ teaspoon vanilla extract
- ½ cup coffee freshly brewed
Buttercream Frosting
- 8 ounces unsalted butter softened
- 2 cups powdered sugar
- ½ teaspoon vanilla extract
- 1 ½ teaspoons heavy cream
Candy Melts and Chocolate
- 24 ounces white candy melts blue food coloring to color a small amount for the eyes
- 2-3 ounces chocolate chips
- 2-4 ounces red candy melts
- 30 sticks
Best Candy Melts vs Chocolate (Which Is Better?)
- Candy melts → smoother, easier for beginners
- Chocolate → better taste, harder to control Best option: Use candy melts for coating + chocolate for flavor drizzle
Step-by-Step Instructions to Make Eyeball Cake Pops
Baking the Cake Base
Start by baking your cake base using red velvet, chocolate, or madeira cake. If you’re short on time, you can use a store-bought cake—just make sure it’s moist. Let the cake cool completely before moving to the next step.
Crumbling & Mixing Cake with Frosting
Crumble the cooled cake into a large bowl. Add a small amount of frosting and mix until it forms a moldable dough. This helps your eyeball cake pops hold their shape without falling apart.
Shaping the Cake Balls
Use your hands or a small scoop to form even cake balls. Make sure they are smooth and round for a perfect pop shape.
Inserting the Sticks
Dip the end of each cake pop stick in melted chocolate or candy melts, then gently insert into each cake ball. This keeps the pops secure while coating.
Dipping Cake Balls in Coating
Melt your white chocolate or candy melts. Dip each cake ball carefully, letting the excess drip off. A smooth coating is key for professional-looking Halloween eyeball cake pops.
Adding Candy Eyes and Veins with Gel Icing
Place candy eyeballs on the wet coating and use gel icing or edible markers to draw veins and pupils. Get creative—make spooky or fun designs for parties.
Tips for Smooth, Even Coating
- Work quickly before chocolate sets.
- Tap the stick gently to remove extra coating.
- Chill the pops upright in a styrofoam stand for the best results.
By following these steps, your easy eyeball cake pops will look amazing and taste delicious.
Perfect Cake-to-Frosting Ratio
- Too much frosting → mushy pops
- Too little → crumbly
Perfect ratio:
1 cup cake crumbs = 1–2 tbsp frosting
Texture should feel like:
Soft dough (not sticky, not dry)
How to Get Smooth Cake Pop Coating
To get bakery-style smooth coating:
- Melt chocolate slowly (20-sec intervals)
- Add 1 tsp oil if too thick
- Dip at 45° angle
- Tap gently (don’t shake)
Creative Decorating Ideas
Making your eyeball cake pops look amazing is half the fun! You can choose a spooky or cute style depending on your theme. For a scary Halloween vibe, add red veins with gel icing and make the eyes look realistic. For a fun or kid-friendly look, try big cartoon-style eyeballs or playful colors.
Experiment with different colors and flavors. Use white chocolate or colored candy melts to match your theme. You can even flavor the coating with a hint of vanilla, strawberry, or chocolate for extra taste.
Add sprinkles, edible glitter, or edible paint to give your pops a unique finish. For a party twist, try glow-in-the-dark or neon eyeball cake pops. These stand out in dim light and make your Halloween party treats even more exciting.
How to Make Realistic Eyeball Designs
For realistic eyeballs:
- Use blue/green candy melt iris
- Add black dot for pupil
- Draw veins with red gel (thin lines)
- Add gloss using edible glaze
Variations for Every Baker
One of the best things about eyeball cake pops is how versatile they are. You can easily adapt the recipe to suit different tastes, diets, or party needs.
No-Bake Eyeball Cake Pops
Short on time? Try no-bake eyeball cake pops by using crushed cookies or pre-made cake crumbs mixed with frosting. These can be shaped, dipped in candy melts, and decorated just like baked pops—perfect for a quick Halloween dessert.
Gluten-Free Eyeball Cake Pops
For friends or family with dietary restrictions, gluten-free eyeball cake pops are simple to make. Use a gluten-free cake mix or crumbs, then follow the same shaping and decorating steps.
Vegan Eyeball Cake Pops
Swap butter, milk, or eggs for plant-based alternatives to make vegan eyeball cake pops. Use vegan frosting, chocolate, and candy melts to keep them tasty and cruelty-free.
Mini Eyeball Cake Pops for Bite-Sized Fun
Want smaller treats? Make mini eyeball cake pops. They’re perfect for Halloween parties, school events, or party favors. Plus, they’re easier to dip and decorate for a fun, bite-sized experience.
Serving and Presentation Tips – Quick Tips
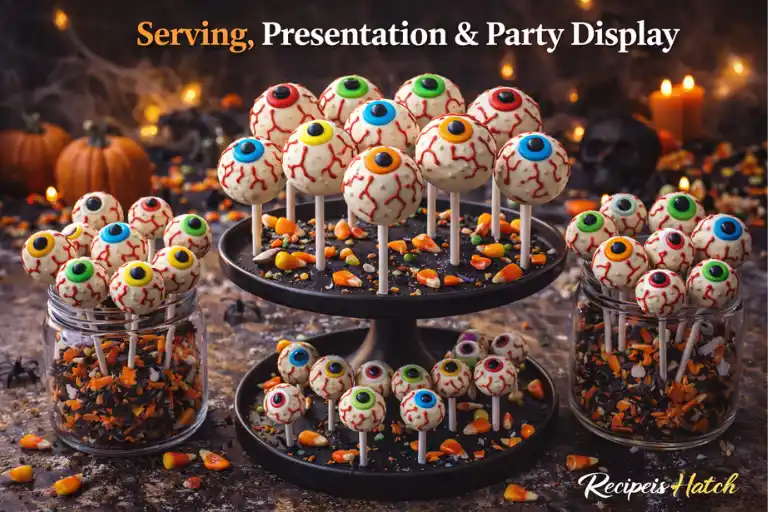
- Arrange Creatively: Place eyeball cake pops on a platter in fun shapes like a spooky circle or graveyard scene to grab attention.
- Use Holders: Keep pops upright with styrofoam or Halloween-themed holders while they dry.
- Decorate the Stand: Add fake spider webs, candy corn, or Halloween decorations to make the display festive.
- Kid-Friendly Displays: Place pops in jars, buckets, or pumpkin-shaped containers for parties or school events.
- Party Favors: Wrap mini eyeball cake pops in clear bags tied with ribbons for giveaways—guests can enjoy them at home.
- Space Them Out: Don’t overcrowd the pops; it keeps the coating smooth and decorations intact.
Cake Pop Drying Setup
Best drying methods:
- Styrofoam block (best)
- Egg carton (budget option)
- Cake pop stand
Make Ahead & Party Planning Timeline
- Day 1 → Bake cake
- Day 2 → Shape + coat
- Day 3 → Decorate + serve
Common Mistakes & How to Avoid Them
Even when making eyeball cake pops is fun, a few common mistakes can happen. Knowing how to avoid them will help your pops look perfect and professional.
Cracking Coating – This happens if the cake balls are too warm or the coating is too thick. Tip: Chill your cake balls in the fridge before dipping and work with smooth, melted candy melts or white chocolate.
Cake Balls Falling Off Sticks – If the stick isn’t anchored well, the pops can slip. Tip: Dip the stick in a little melted chocolate before inserting, and make sure each cake ball is firm.
Candy Melts Clumping – Overheating or moisture can cause clumps. Tip: Melt slowly and stir gently. Add a tiny bit of vegetable oil if needed.
New: Overcrowding When Drying – Crowding pops can ruin the coating or decorations. Tip: Use a styrofoam stand and leave enough space between pops so they dry evenly and maintain their shape.
Why Cake Pops Crack (And How to Fix It)
Cracking happens due to temperature difference:
- Cold cake ball + hot chocolate → cracks
- Thick coating → uneven drying
Fix:
- Let cake balls sit 2–3 mins after fridge
- Use lukewarm melted chocolate
- Avoid double dipping
FAQs About Eyeball Cake Pops
Q1: Can I make these in advance?
Yes! Eyeball cake pops can be made 1–2 days ahead. Store them in an airtight container in the fridge to keep them fresh. Avoid decorating too early if you want the coating to stay smooth.
Q2: How do I store eyeball cake pops?
Store your pops in a cool, dry place or in the fridge. Keep them upright in a styrofoam stand to prevent them from rolling or sticking together. Proper storage ensures your Halloween treats look great for parties.
Q3: Can I use cake scraps instead of baking a whole cake?
Absolutely! Leftover cake or cake crumbs work perfectly. Just mix with a bit of frosting to make a moldable dough for your pops.
Q4: What flavors pair best with eyeball cake pops?
Popular flavors include red velvet, chocolate, and vanilla. You can also try pumpkin spice, strawberry, or cookies & cream for fun variations.
Q5: Can I customize eyeball pops for birthdays or other holidays?
Yes! Eyeball cake pops are versatile. Change the colors, decorations, or candy eyes to match birthdays, parties, or seasonal themes beyond Halloween.
Recipe Card – Easy Eyeball Cake Pops (Spooky Halloween Dessert)
Course: DessertsCuisine: American, Halloween TreatDifficulty: Easy30
servings30
minutes40
minutes180
kcalThese eyeball cake pops are spooky, fun, and perfect for Halloween parties. Made with moist cake, creamy frosting, and smooth candy coating, they’re easy to decorate with candy eyes and gel icing for a creepy yet delicious treat.
Ingredients
- Cake Base:
7 oz all-purpose flour
1 cup sugar
3 oz cocoa powder
1 tsp baking soda
½ tsp baking powder
½ tsp salt
1 large egg
½ cup buttermilk
¼ cup vegetable oil
½ tsp vanilla extract
½ cup freshly brewed coffee
- Buttercream Frosting:
8 oz unsalted butter (softened)
2 cups powdered sugar
½ tsp vanilla extract
1½ tsp heavy cream
- Coating & Decoration:
24 oz white candy melts
Blue food coloring (for iris)
2–3 oz chocolate chips
2–4 oz red candy melts
Candy eyeballs (optional)
Gel icing (red for veins)
- Tools:
Cake pop sticks (30)
Styrofoam stand
Piping bags
Small brushes
Instructions
- Bake the Cake
Bake your cake using the ingredients above. Let it cool completely before use. - Crumble & Mix
Crumble cake into a bowl and mix with frosting until it forms a soft dough. - Shape Cake Balls
Roll into evenly sized balls (about 1 inch). Smooth surface for best results. - Insert Sticks
Dip cake pop sticks into melted chocolate and insert into cake balls. Chill 15–20 minutes. - Melt Coating
Melt white candy melts slowly, stirring until smooth. - Dip Cake Pops
Dip each cake ball fully into melted coating. Tap gently to remove excess. - Decorate Eyeballs
Add candy eyeballs or draw iris using colored melts
Use red gel icing to draw veins
Add chocolate dot for pupil - Set & Serve
Place in styrofoam stand and allow to fully set before serving.
Recipe Video
Notes
- Always chill cake balls before dipping
- Use thin melted coating for smooth finish
- Dip stick first → prevents falling pops
- Work quickly before coating sets
- Avoid overheating chocolate
Conclusion
Making eyeball cake pops is not only delicious but also a fun way to get creative in the kitchen. Don’t be afraid to experiment with decorations, colors, and flavors to make each pop unique. Whether you try spooky designs for Halloween, mini pops for parties, or custom variations for birthdays, the possibilities are endless.
With the right ingredients, simple steps, and a little imagination, you can create eye-catching treats that will impress your friends, family, and party guests. So grab your cake crumbs, candy melts, and candy eyes, and start making your Halloween eyeball cake pops today!